| One of the posters at
the Jewelry Artists Forum asked for some before & after photos of
cabochons, so I thought I'd add this page so you could see what's it
like cutting cabochons. |
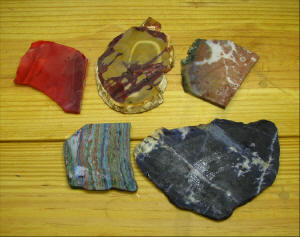
| Some days the most difficult times
I have are deciding which slabs to cut. My shop has enough
rough to last me three years or so, so I have lots from which to
choose. Here's the group I picked out
for possible cutting today: Colored Glass, Mook Jasper, Ocean
Jasper, Rainbow Cal Silica, and Sodalite. |
 |
|
 |
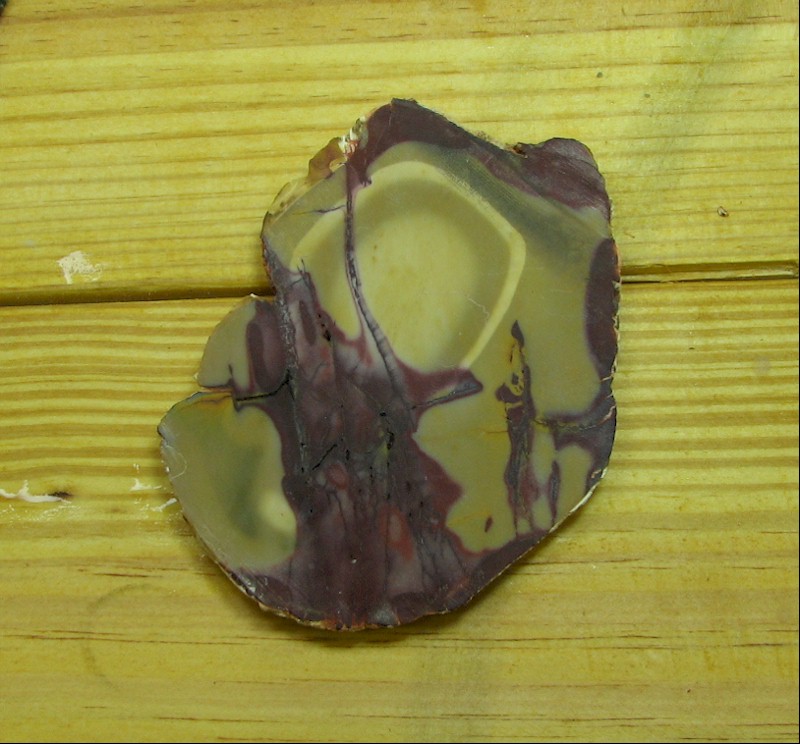
Here's the lucky candidate!
A nice piece of Mook Jasper from Australia. If I had the
equipment to polish slabs, this slab would be a great candidate for
a display; it has an eerie landscape with a pale yellow sky and a
big angular sun in the sky! Not to
be, this puppy is about to be scored, sawed, and cut & polished. |
|
|
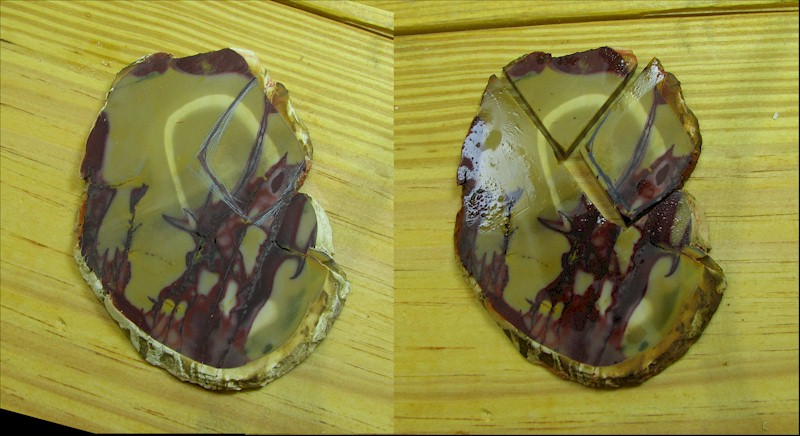
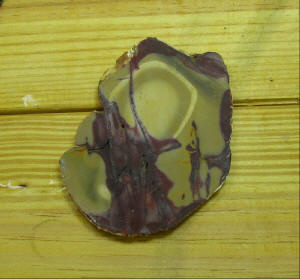
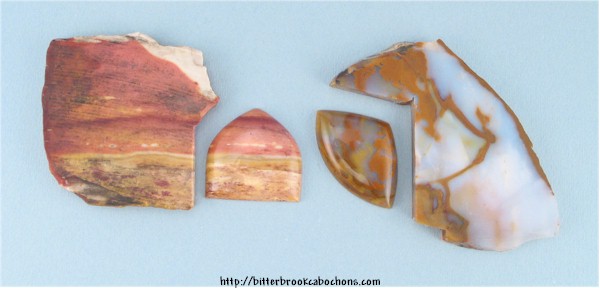
Sadly, while very cool as a yellow sky
in a large picture slab, the yellow portion is pretty boring in
cabochon-sized chunks. The dark parts at the bottom of the slab
will get cut another day. For now, the portion at upper right,
with the bold red streak, looks good to me. Natural features of
the slab guide my decision. In the left-hand photo, along the
lower right part of where I've marked, you can see a fracture; at the
bottom point of the future cabochon extending downwards and right, is
another fracture. Mook has fractures; some are pretty stable,
like the dark streak which led me to the cutting decision, but others
are just troublesome. The features in the slab, then, "help" the
lapidary decide what to do next. Sam Silverhawk, undoubtedly the
most gifted cab cutter in the world (my opinion), calls this "letting
the rock talk to him."
In the right-hand photo, you can see
where I've cut my preform from the slab. Pretty, huh?
|
|
|
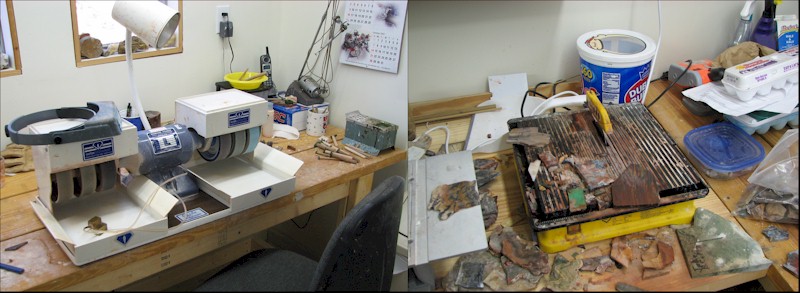
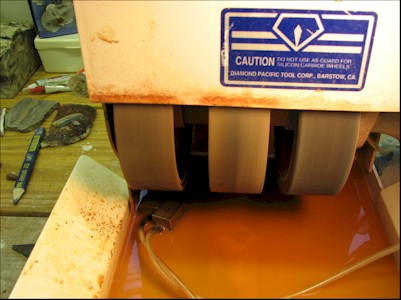
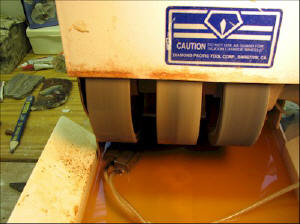
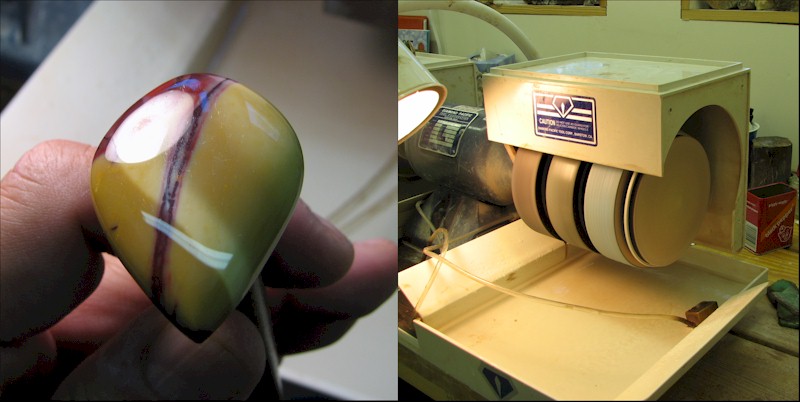
Let me digress.
The machine on the left is made by Diamond Pacific in California; it
is their "Genie" model grinder-polisher. It has six six-inch x
1-1/2 inch wheels; the first two are diamond grinding wheels (80 & 220
grit), the next four are Nova sanding & polishing wheels (280, 600,
1200 & 3000 grits). I use a 50,000 grit wheel as my final
polishing wheel. DP sticks a $2,150 suggested retail price tag
on these beauties; discounts are available if you're patient, and they
occasionally show up in auctions & elsewhere as used equipment.
Make sure the wheels are good, though, or you'll drop an additional
$600+ to buy a new set. All that said, this is the best G/P
machine on the market for someone to do some serious cabbing with.
All grinding & sanding is done "wet," with air-fed geysers shooting
water up from the plastic trays. Run your Nova wheels dry for
too long and you kill them!
The filthy, rock
mud-covered thing on the right is a little tile saw from Home Depot
that is my main trim saw. I've added four-inch diamond cutting
blades to this no-name machine and it does a very good job for less
than $50.
|
|
|
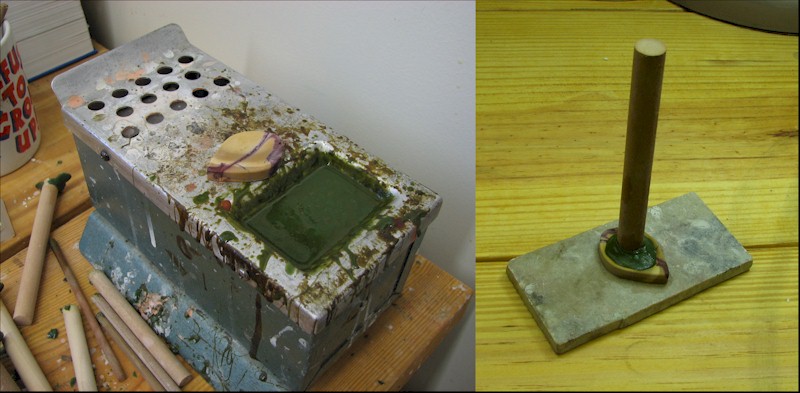
Another dirty-looking thing!
This is a vintage dop wax heater made by Ray-Tech. A 100-watt
light bulb inside melts dop wax in a small reservoir. Dop wax
secures the preform to the dop stick for working on the G/P machine.
On the left, you can see the preform heating up on the dop wax heater;
this helps the wax to hold. On the right is the dopped preform
sitting on a small rock slab to cool. If you get in a hurry and
work the preform before the wax cools, you'll lose the preform when
the still-soft wax gives way. I get the preform oriented on the
dop so the the bottom plane of the preform is perpendicular to the dop
stick (or just plain dop, for short).
|
|
|
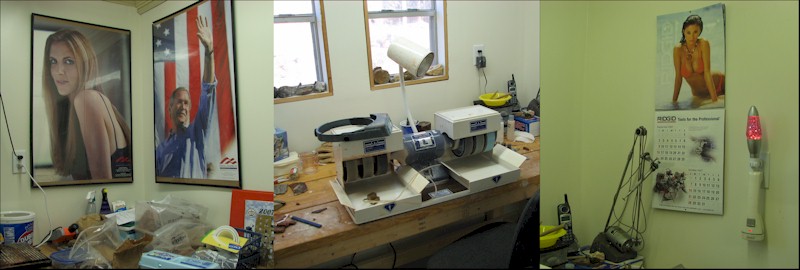
While I'm waiting for the dop wax to
cool, I'll show you what I see when I'm sitting at my work station.
Left to right. Posters of Ann Coulter (who proves that
Conservative women are hot) and President George W. Bush. Yeah,
I'm a Conservative. Don't talk down America, the President, or
any man or woman who is wearing the uniform of any of
the US Armed Forces, and we'll get along fine. In the center photo, you can see the windows
I installed behind the Genie
so I could watch my wife in the garden. In the right corner are
the phone for contact with The World, a broken dental machine for
which I have great plans, a Ridge Tool girlie calendar, and my
flashlight and pink Lava-light night light (best $1 ever spent at a
yard sale). [Winter update--the lava lamp night light froze
one night and ceased to function; it has been thrown away and properly
eulogized.]
Full disclosure requires me to say that I don't know if the women in
the calendar are Conservatives. But I pretend they are.
[Calendar update--unlike the good-old-days when the models in the
classic Ridgid Tools calendar were actually holding tools on the
photos, these days they are not. So I'm not renewing my
subscription.] OK, dop wax is cool, let's move on...
|
|
|
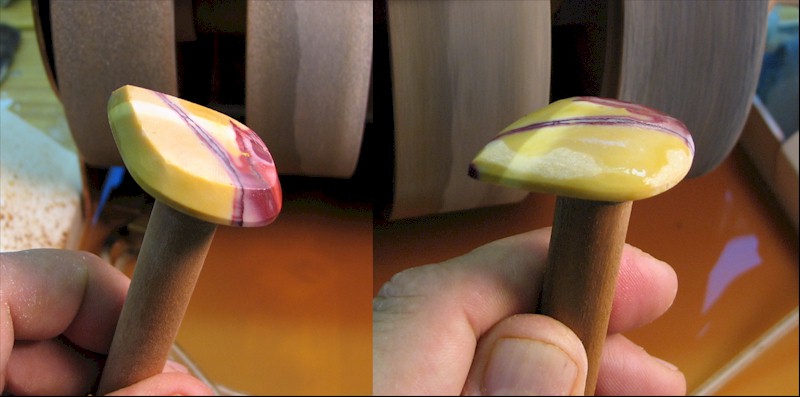
First thing to do is get the dome
started. On the 80-grit wheel, cut around the top of the preform
in a 45-degree or angle. I leave a little (1mm or more) waist
around the preform (shown at left) which makes the cabochon easier to
wire wrap, but in this case I decided to round the edges. But I
still start with the straight-sided waist. I got from here to
the photo on the right by cutting around the top in successively lower
angles to approximate a dome on the cab. With a hard rock, the
80-grit wheel is the one I'll get most of the shaping done.
Softer rocks like Sodalite, Lapis, and Rhyolite will get shaped on the
220-grit wheel.
In the photo on the right, you can
see wet & dry areas on the cab. Although it's too early to make
a difference at this stage, ALWAYS evaluate your cabochons for
scratches DRY. Water hides the scratches, and it's a b*tch to
get all the way to final polishing before noticing a scratch.
That said, you can more easily determine if you dome is really domed
(with no flat spots) if the cab is wet. But a scratch will kill
a cabochon just a quickly as a flat spot. You can also see in
the right-hand photo that the flat edge is just about rounded off.
This is done by working the cab in constant motion across the grinding
surface.
Watch out for the wheels' edges!
They will put a HURT on your cabochon that will ruin your day...
|
|
|
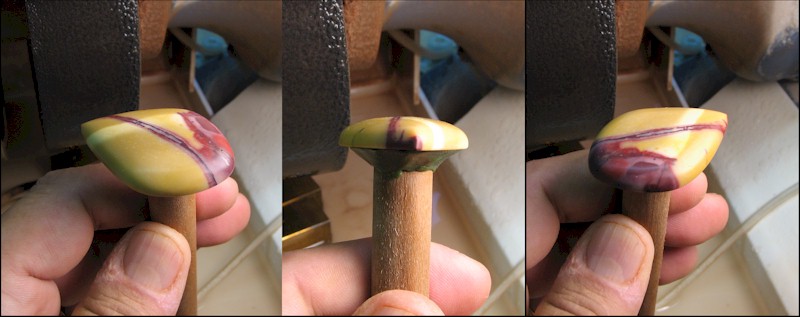
Nice, Huh? These photos show the
shaped cabochon after working the two grinding wheels and the first,
280-grit, polishing wheel. Each wheel, as you progress
left-to-right along the Genie, has the added job of removing scratches
put in the cab by the previously-used wheel. The two grinding
wheels will put gazillions of scratches in the cab; your job as
lapidary is to get them all out with the 280-grit wheel. No, you
won't get them all the first time; yes, you'll have to frequently come
back to the 280-grit wheel (and sometimes to the 220-grit wheel).
|
|
| Another aside.
Besides looking nasty, dirty water in your
reservoir has rock grit floating in it which will SCRATCH YOUR
CABOCHONS!
Clean your water reservoirs frequently; refill
them with clean tap water. And don't
move a cab directly from one wheel to the next without cleaning it
off (rinsing or wiping). |
 |
|
|
|
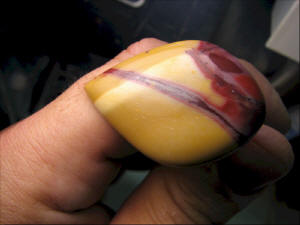 |
Looks good? NO! This cab
has scratches! This photo was taken after polishing on the
600-grit wheel. Polishing makes finding scratches easier; get
used to moving around the Genie a lot...
Click on the photo for a closeup; you
will see lots of small scratches on the bottom part of the cab.
Notice that the cab is DRY; you won't see those scratches on a wet
cabochon.
Note the fracture in the cabochon.
Sometimes, with a Mook Jasper, I put some Super Glue along the
fracture and polish it down just for appearance's sake. It'll look fine.
I always check large fractures to be sure they're stable; if the cab
doesn't break in two when I twist it & tweak it, that's a bonus! |
|
When a cab looks as good dry as it
does wet, it's pretty close to being finished. Move your cab in
the light and watch the reflections. They should be curved.
If they are not, you are looking at a flat spot. And the number
one rule in MY cabbing book is,
FLAT SPOTS SUCK!
The photo on the right shows a fabric
polishing pad which I use for final polishing with either Tin Oxide or
Cerium Oxide.
I used to have a link here to a short
movie I took while moving this cab back and forth so you could see the
cabochon's curvature by clicking a link in a little bit. It was
13 seconds and was a 9MB file. Way too big for 13 seconds, so I
removed it. You can always see shiny new cabs by clicking
here.
|
|
|
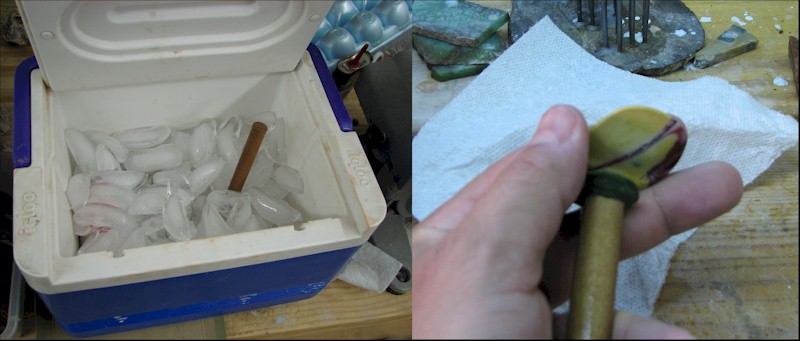
Getting the cabochon off the dop is
easy. I just stick it down in a cooler full of ice. The
ice gets the wax cool and brittle, and a sharp twist or tug will pop
the cab right off. Back to the Genie to get the last of the dop
wax off the cabochon...
|
|
|
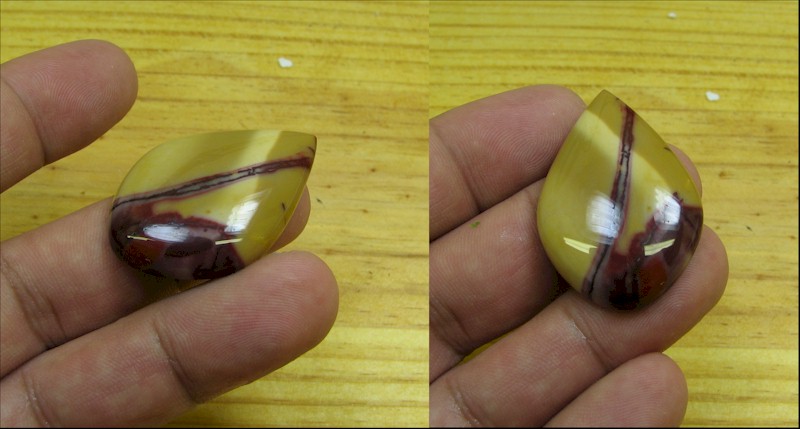
Here is the finished
cabochon! Pleasing freeform cut, nice shine, with no flat
spots.
|
|
|
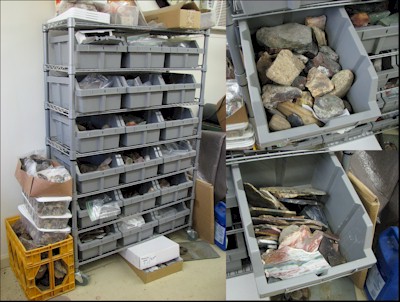 |
Here are more rocks
to cut. Lots more
rocks, enough to last at least three years!
They're in bins and boxes, on the
benches, under the benches, and outside the shop. |
I hope you enjoyed this quick lesson in
cabochon cutting. If you have any questions, please e-mail me
and I'll try to answer.
 |
|